
People often think that good photography is all about the gear – having the latest cameras and lenses that will guarantee that perfect shot. With the advent of hi tech smartphones however, the perfect shot is just within reach of your smartphone’s camera. In fact, my iPhone has the same image resolution as the professional camera I bought a few years ago! Great photography isn’t about the gear, it is about the photographer behind the gear. You can learn to take great shots with your smartphone by following just a few simple rules.
Please note: These tips are intended for smartphone users. They cover the basics and use the iPhone as a primary example, but should be general enough to be relatable to any smartphone user.
space here
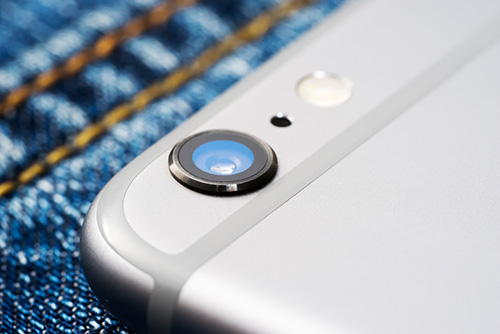
Rear-facing lens on an iPhone
1. Keep Your Lens Clean
Sometimes the secret to having a sharp (in focus) photo is as simple as wiping your lens before you take the picture. Unlike your regular cameras, your smartphone’s lens isn’t covered by a lens cap or built in mechanism that retracts it every time you shut the camera off. Your phone sees some pretty dirty places. Your purse and pocket are full of lint and debris and I can guarantee that at least half the time you take your phone out, you are unconsciously touching the lens. Even if your hands are clean, the natural oils in your skin can build up over time. All of this muck can result in dark, hazy images. Luckily, your smartphone’s lens is built tough and can handle the abuse. A simple swipe of a soft cloth (your shirt will do in a pinch, but try not to make a habit of it) and you’re good to go!
Bonus Tip: Being aware of where your lenses are will help you keep your fingers from photo-bombing your shots! There are two lenses on smartphones these days – a rear facing lens located on the back of your phone, and a front facing lens located on the front of your phone. The front facing lens is used primarily for FaceTime and video chats and has a lower resolution than your rear facing lens. The rear facing lens is the one you want to use for taking photographs, even selfies, because it will have the highest resolution. I know it is difficult to take a selfie without being able to see the preview screen, but practice and get used to it. See my bonus tip at the end of the article for more selfie tips.
2. Use the Highest Resolution Possible
It can be really tempting to tap down on your camera’s resolution settings (not available on all smartphones) to save space on a phone with an already limited storage capacity, but try to avoid doing this. With a higher resolution, your photos will be sharper and better for sharing and printing. This is most important, and often an available option, on camera phone’s that have a lower megapixel count. (To find out your camera phone’s megapixels try googling ” how many megapixels is the (specific make and model of your phone, ex. iPhone 6).” Note: If printing your photos is unlikely and you just want to share them digitally, you can drop the resolution down a little to save space.
3. Take the Time To Learn About Your Phone’s Peculiarities
With so many features being built in to smartphones these days it can be hard to keep up. From auto-focus to exposure adjustment, smile detection to HDR, there are so many small tools built in to each model that, when used properly, can take a mediocre photo from drab to fantastic. There are many videos available online to make learning about your phone easy. Try typing “(specific make and model of your phone) camera tips” and click on the video search tool in the top bar.
4. Practice Tapping Your Screen/Shutter Button and Learn Your Phone’s Other Shutter Controls
Your phone is a pretty sophisticated camera, but it isn’t perfect. Many smartphones have a brief “shutter lag” – the lag time between the moment you tap the shutter and the actual photo being captured. In most cases this is just a matter of a second or less, but a second can be just long enough to cause motion blur. This is why it is important to hold still a little longer than you normally would. Also, remember that it is a touch screen – the amount of pressure applied does not matter in most cases. Use a light touch that won’t jolt your phone and pause for just a half-second before moving the camera. Many cameras also come with the option of using the volume buttons as a shutter button. Sometimes these can be easier to use because they are closer to the shutter button feel of a hand held camera. If you have built-in volume controls on your headphones they can also be used as a remote shutter button.
5. Use Your Phone’s Auto Focus
 You know that little box that pops up on your screen when you’re in camera mode? There are a lot of handy features contained in that little square. Tap anywhere on the screen to get the box to focus on that section. This little box also controls your exposure in most cases. When you tap on a specific part of an image (before taking the picture) your camera will focus on that image and measure the amount of light in that area so that it can adjust the exposure for the entire image accordingly. This is why you will often get a blown out sky or a really dark foreground when trying to take a picture of a sunset, for example. Whenever you are trying to take a picture of a scene with bright highlights and darker shadows, try tapping on a portion of your image that is more of a midpoint between the shadows and the highlights for a better exposure overall. If you want to get creative or, for example, if the sunset sky in your image is more important than anything in the shadows, tap on the sky and let everything else fall away. To get a little more advanced, some phones have a feature where you can tap to control the area of focus and then slide your finger up or down to control the overall exposure. You’ll often be able to tell if your phone has this feature by whether or not a small sun icon appears next to the box (smartphones may vary, consult your phone’s manual for more information).
6. Keep Still and Avoid Using Your Camera’s Flash
The steadier your camera phone is when you take your picture, the clearer your image will be. This is a bit of a repeat of my last tip. Don’t rush through your photograph. Use a steady hand and a light touch, and pause for half a second before moving your phone. I am repeating this tip because it is especially important in low light situations. You want to avoid using your camera’s flash as much as possible. I know, this tip is going to be hard to accept, but trust me on this one, your pictures will come out better if you can find a way to brace your phone against a wall or another solid object and allow the camera to use a longer exposure. Your smartphone’s flash is really just a glorified LED flashlight. (Have you ever noticed that the flashlight function just makes your “camera flash” come on and stay on?) It’s garishly bright, and does not function like a normal flash. On a regular camera, the flash freezes the action like a strobe light. On your smartphone, the flash stays on too long and results in images that are blurry and terribly-lit. Instead, find a way to keep your smartphone as stable and still as possible when it takes the picture, or seek out more creative light sources in dimly lit areas.

Concert image taken with a flash

Same concert taken with a steady hand and no flash
There are always exceptions to the rules. Sometimes capturing the memory of the moment is more important, in that case, fire away with your flashy self.
Bonus Tip: If available, experiment with your smartphone camera’s HDR function. When this is turned on, your camera will take a little longer to snap the picture (hold still!) because it will take several shots at different exposures and then stitch them together to get a more properly exposed image overall. This is a great occasional tool, but not necessary or ideal all the time.
7. Crop Don’t Zoom
Even if your smartphone offers a digital zoom function, you’re usually better off not using it. When you zoom in on an image your camera basically takes a guess at what the image looks like by enlarging the pixels. The result is grainy, soft focus images that roughly resemble what you were trying to capture. With most smartphones having 8 megapixel cameras or better, you can crop your image later and still have it look web-ready. (Note: this tip isn’t as important if you have a newer smartphone with an optical zoom, rather than a digital zoom.)
8. Pay Attention to Your Background and Surroundings
Take a moment to glance away from your subjects and pay attention to what is behind them. Is the waterfall/building/landscape you’re trying to show well positioned behind them? This is one of those times where the trick of focusing on a midpoint can come in handy for both focus and proper overall exposure. Now, look at your subjects again, do any of them have a tree or a pole or some other strange object coming out of their head? This may not seem like an important detail, but your pictures improve significantly when you avoid distracting elements. Remember what I said in the beginning, a good photograph isn’t about the tool, it is about the person taking the picture. If you follow the basic rules of photography, your images are guaranteed to come out better. For a good overview of important things to keep in mind for better shots, check out this website.
9. Light Your Subject Well
Bright sunlight can be great to avoid dark and underexposed shots, but they can be terrible for squinting, and blinking, or dark subjects in front of a bright background. Try to avoid having your subjects backlit or facing into the direct sunlight. On bright sunny days, put your subjects in the brightest patch of shade possible, and choose the second brightest portion of the image for your exposure. Cloudy days are often a photographer’s best friend. Clouds diffuse the light making proper exposure much easier.
Bonus Tip: One to two hours after sunrise and one to two hours before sunset are referred to as the “Golden Hour” or “Magic Hours” in photography. This is the beautiful light that is the setting for many fairy-tales – the sky is colorful and there is a perfect balance of light to capture land and sky with a decent exposure.
10. Have Fun
 One of the great things about digital photography is that you can shoot as much as you want! Long gone are the days of carefully selecting those perfect shots because you only get 24 frames on a roll of film. Enjoy this lifting of limitations and have fun shooting as much as you want. Experiment with different lighting. Explore creative angles for your shot – what happens if you take the photo from a lower viewpoint than normal, or if you lift your smartphone up for a higher viewpoint? Experiment with panoramas. Go in for a close-up. Try new poses. The enjoyment you put into taking the picture will show in your photograph. Be kind to yourself and don’t take it too seriously.
 Bonus Tip: For the perfect selfie, use the rear facing lens and hold your smartphone slightly higher than directly in front of you and tilt your head up just a little to look into the lens. Squeeze the volume button to take the shot. Let go of the ease of the front facing camera. Practice makes perfect when it comes to fitting everyone in the frame and you’ll appreciate the higher resolution. Hold your smartphone out and take several photographs, moving your hand just an inch down, then to the right, to the left, up, angled this way, and then that. One of those photos will come out a winner, and you’ll get a better idea of what works through the experiment. For added ease, try using the headphone trick I talked about earlier.


1 Comment